
This is the 3rd and final part of the blog series, so make sure you check out Part 1 & Part 2.
At the recent Tableau conference there was a lot of talk around the Salesforce product Einstein and how this is starting to be integrated into some areas within the Tableau product range. Salesforce and Tableau have allowed users to bring all of their data together by combining Einstein Analytics and Tableau to form Tableau CRM.
Tableau + Einstein = Tableau CRM
This blog is going to focus on comparing the similarities and differences between the data preparation aspects of both products - Tableau Prep and Einstein Analytics. The key areas that I will focus on are:
- Input - How do you connect to data?
- Investigation - Getting to know the data and if there are any problems
- Cleansing - Cleaning the data with filters, calculations and string manipulation
- Combining - Joining and unioning the data
- Output - How can you get the data after you’ve finished?
The final part of the series is going to focus on when you need to Combine different data sources, and also what the options are to Output the data.
Combining
Often we will have different data sources which need to be combined together, this is often in the form of a Join or Union. A basic way of thinking about this is Joining is placing the tables side-by-side where certain row values match, and Unioning is stacking the tables on top of each other.
Let’s see how both tools deal with combining different data sources.
Tableau Prep
Joins
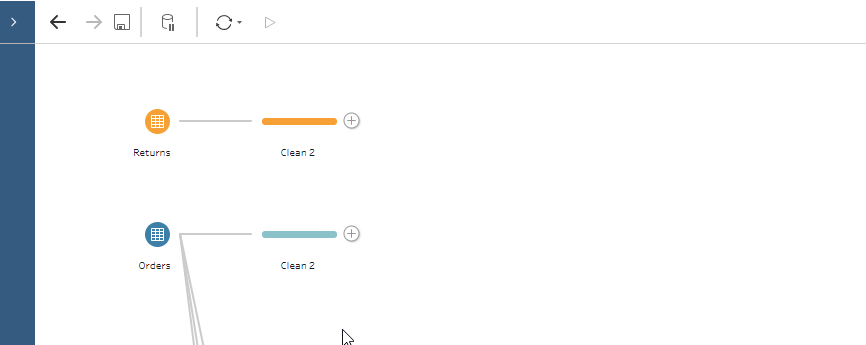
As with a lot of the other areas that I have touched on, Tableau Prep has a join tool natively built in. All you need to do is drag one tool on top of another until the ‘Join’ label changes colour then you will have created a join tool.
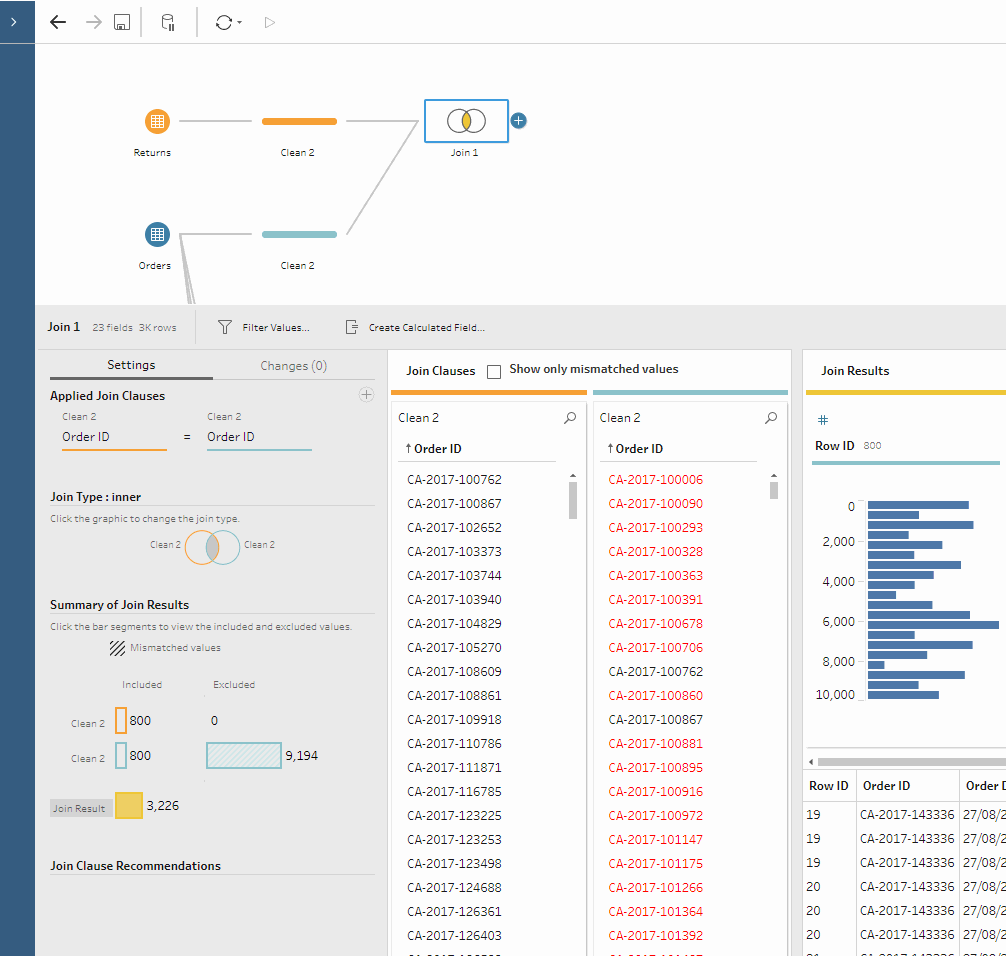
After creating the join, Tableau Prep gives you the ability to create the join conditions, and control what type of join you are creating. You have control on the fields that are joined together and also how these are joined by selecting options from the dropdown menu including:
- Equals
- Not Equal
- Greater/Less than
- Greater/Less than or equal to
You can then choose the type of join Inner, Left, Right or Outer by selecting the corresponding section within the Venn diagram. Tableau Prep then provides a list of values from each table with black/red colour coding about which values are included/excluded.
Union
There is a similar technique with the union process. Again, there is a dedicated tool which can be created by dragging one tool on top of another, but this time onto the union section instead.
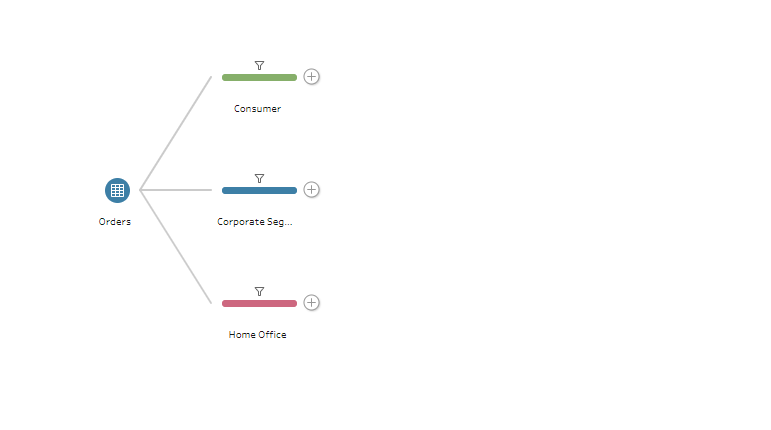
Tableau Prep automatically matches fields by name, but it does give you the option to match or separate fields which have been identified incorrectly. It also creates a Table Names field, with details about the origin of each of the values which can be useful with the combining process.
Einstein
As normal we will split into two sections for Dataflows and Recipes.
Dataflow
Similar to Tableau Prep, the Dataflow also has two different transformation tools which allow you to combine data from different sources.

These are:
- Augment - this is similar to the joining process with Tableau Prep. After selecting the transformation this opens the setup menu where you can select Left/Right Table, the joining keys, and the fields that you want to bring through from the right table.
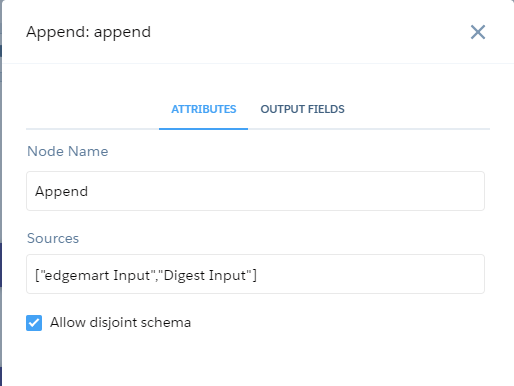
- Append - this is similar to the union within Tableau Prep, as you can select multiple data sources to be stacked on top of each other. If there are different or additional column names then you will need to select the ‘Allow Disjoint Schema’ as they will allow the workflow to run without failing.
Recipe
Similar to the other products a recipe also has two options for combining different data sources. Instead of the Augment & Append in a Dataflow, a Recipe uses the wording ‘Add Data’ and ‘Append’ which I think is a lot more user friendly.

Comparing this to Tableau Prep and other tools, I like to think of ‘Add Data’ as a join and the ‘Append’ as a union.
So after pressing the ‘Add Data’ option, we need to select the additional dataset from the list. The next page is similar to the Tableau Prep setup where you choose a join condition and then select the join type (Inner, Left, Right etc).
This is a much nicer user interface compared with the Dataflow and gives the user a clear understanding of what data is being added and how it is being combined with the original data source.
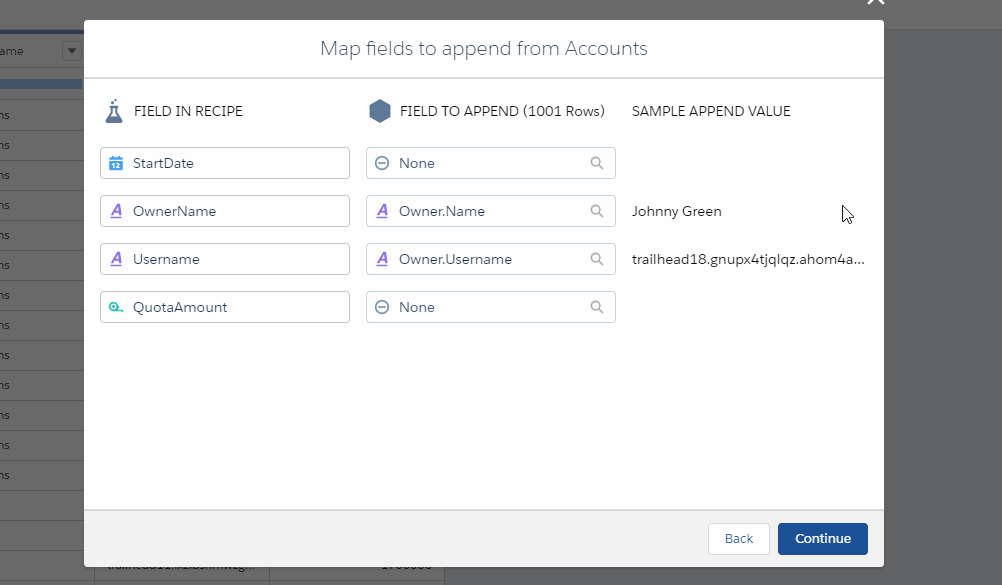
Next is the Append tool, this also has a nice visual which is probably the nicest out of all the tools. After clicking the ‘Append’ button you have a selection menu where you can choose the mapping between the fields:
As with a lot of the other examples a lot of the functionality is broadly similar with the different tools having their own abilities to combine different data sources.
Output
The final area that I will focus on is where the data goes after you have completed the cleaning process and have the data that you require. Within this step we need to remember that Einstein is designed just for use within Salesforce so therefore some of the options are limited compared to Tableau Prep which is a much more universal tool.
Tableau Prep
When you have finished making your changes within Tableau Prep you can use the Output tool to extract your data to be used elsewhere. There are various different options when outputting:
- File - This allows you to output to a Tableau Hyper Extract or a CSV file.
- Published Data Source - This is creating/updating a data source directly on the Tableau Server
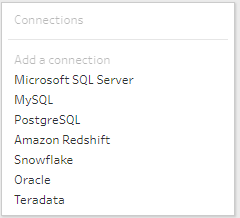
- Database Table - This allows you to connect to various databases where you can create/update tables directly. The databases that are currently available include:
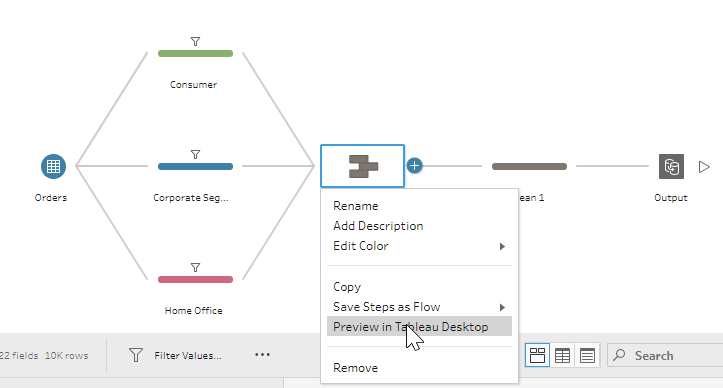
Alternatively you can also directly view the data within Tableau Desktop using the ‘Preview in Tableau Desktop’ option from any step in the workflow (not just the output). This allows for quick cross referencing and easier ability to see if you are on the right track.
Einstein
As normal we have a couple of different options to use here in a Dataflow and Recipe.
Dataflow
The Dataflow has the option to register the dataset so that it is available for queries within a Salesforce Org. This would be a similar process as publishing to a Tableau Server. In the setup you can choose the following:
- Alias: API name of the registered dataset
- Name: Display name of the registered dataset
- Source: Which node is the data coming from
- Sharing Source: The object from which to inherit sharing.
- Security Predicate: The predicate used to apply row-level security
Recipe
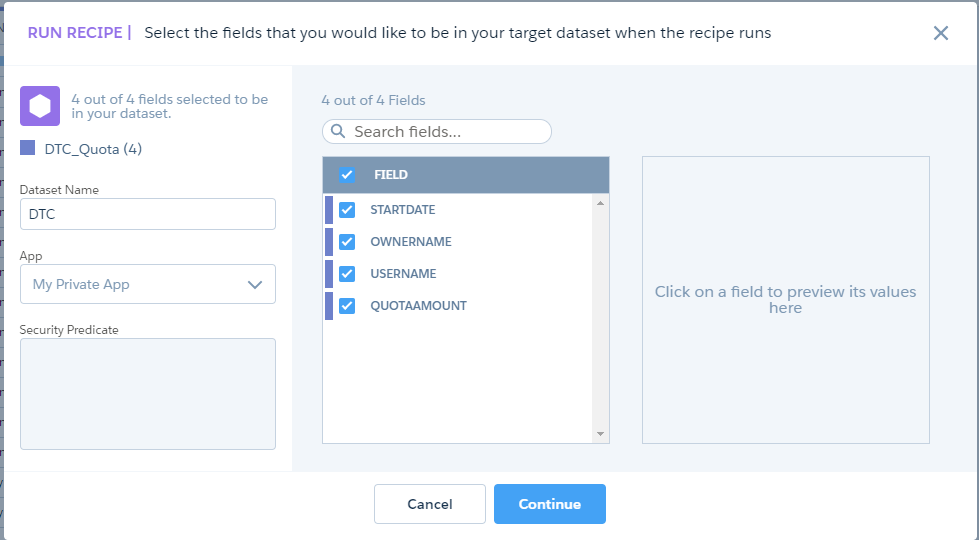
Within a Recipe there is a similar process where you update the dataset which can then be used in Salesforce. You have a choice about where to save it, for example in a shared App and also what fields to process.
This can be automated to run on a set schedule or a one off. This is similar to Tableau Prep where you can schedule workflows to run when published to a Tableau Server and using the Tableau Prep Conductor.
You've made it! That's the end of this blog series all about comparing Tableau Prep and Salesforce Einstein Analytics. Hopefully you have a bit of an understanding about how Tableau Prep and Einstein Analytics compare and how they can come together in the future.
If you're interested in learning more about Tableau and Salesforce then please get in touch via info@theinformationlab.co.uk!