

Since beginning my PBI journey, I've been trying to find similarities and differences between it and Tableau to aid my learning. Here we'll look at switching data sources in both Tableau and PBI. There are two methods of switching data sources in PBI - one that is very similar to Tableau and one that is different.
All the methods covered in this blog assume that the data sources we are switching from and to have the same data types and column names (for example switching from a 2018 sales table to a 2019 sales table).
Tableau Data Sources
We'll start with simple bar chart made using superstore (below) so we can compare.
Next we'll connect to superstore again so that we have two data sources in the same workbook. We'll modify the new data source a bit later so that we can see the difference.
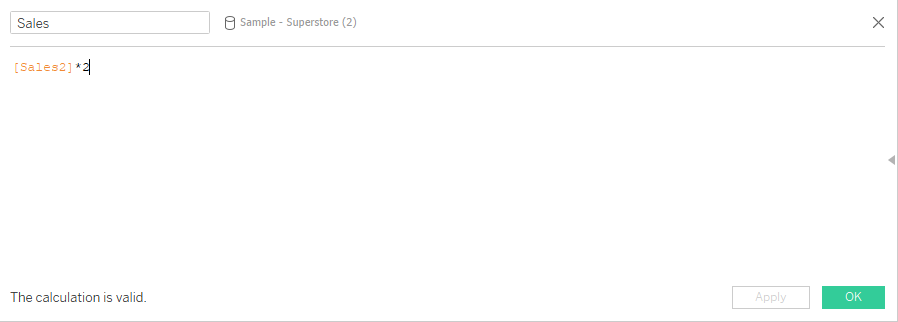
In the new data source I've renamed sales to Sales 2 and created a new calculated field called Sales (below). This way when we replace the data sources, we'll directly be able to see the change in the chart.
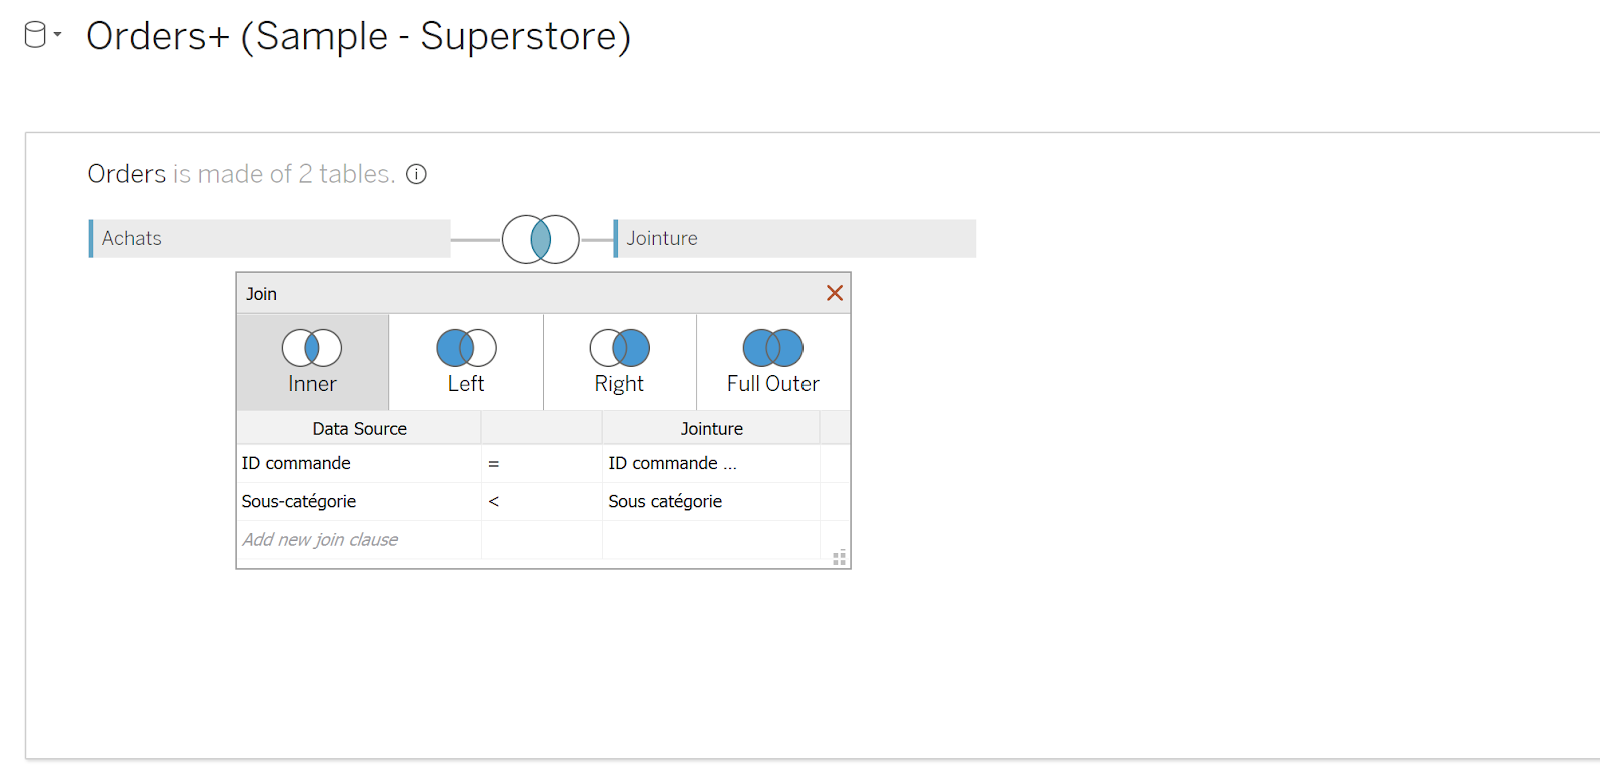
Finally, right click on the original data source and select the new data source to replace it with.
PBI Data Sources i) - Changing Source File
In PBI example 1 we'll look at the method similar to Tableau. To do this we'll use Version 2022.1 and 2022.2 Superstore's Orders table - to take advantage of the introduction of Canada. For this to work we'll have to rename the 2022.2 state/province field to state so that the column names are consistent.
Again we'll make a simple bar chart using the 2022.1 Superstore orders table (below).

Next Select File -> Options and Settings -> Data source settings and select the 2022.2 Superstore file.
Don't worry about the error those have occurred because Canadian postcodes have letters whilst US Zip Codes don't causing data type problems. We could go back and change it but for the purpose of demonstration it's fine as is.
PBI Data Sources ii) - Changing Source Type
The major issue with the above method is that it requires the new file to be of the same source type (e.g. Excel, CSV etc). We can however, take advantage of the M code to replace one connection with another.
For this method I'll be using one of my own data sources, that I had uploaded as a GSheet to make a report, before wanting to switch it to a SharePoint List, to allow for better integration of the Power Platform (also the GSheets data source is buggy so I'd stay away from it).

Step 1 is to open up power query and make sure that you have both connections in two separate queries. In this case I had to make some transformations to the GSheets Data Source for the report that I'd like to keep when switching to the SharePoint List (Keep rows, rename fields etc).
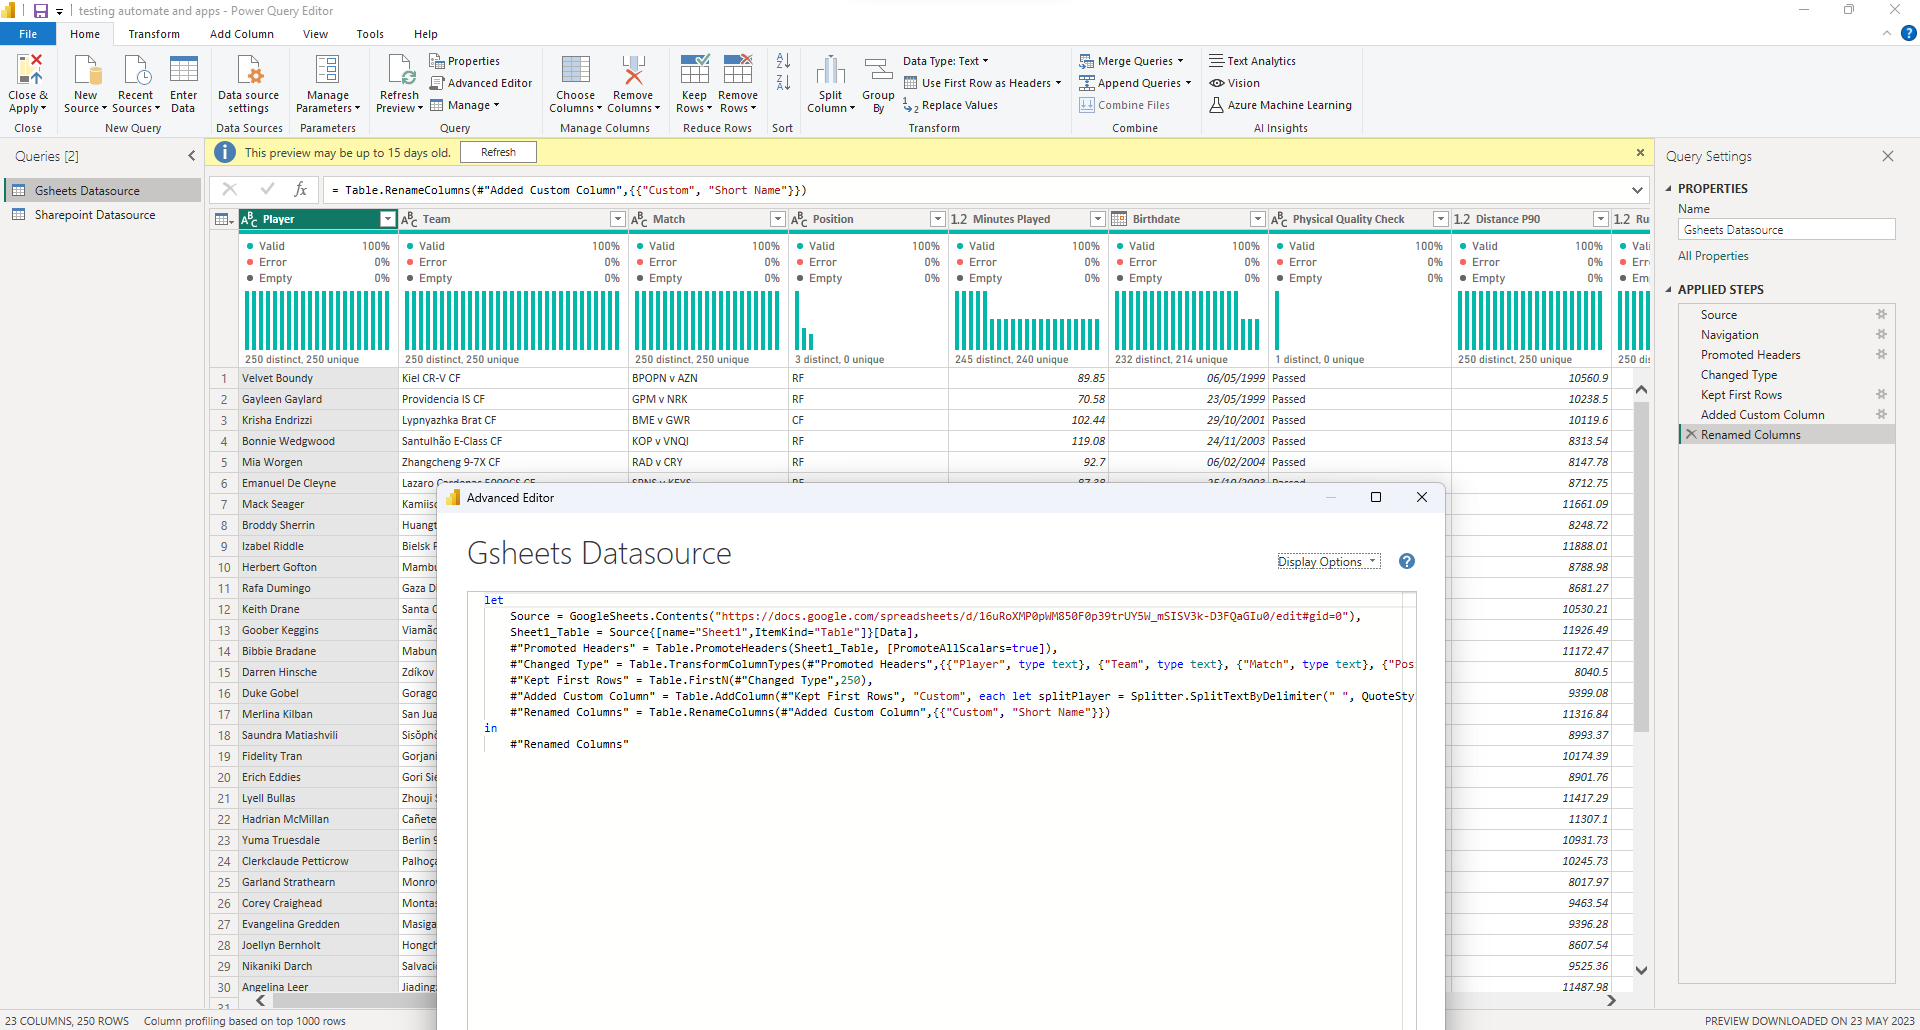

Next, open up the advanced editor in the new query, copy the bit that we want and paste it into the old query.
If we hit done here this query won't work, because it's referencing two separate data sources in one. So the next thing we'll do is comment out the line that are inputting the old data source.

The next thing we need to do is add a comma to the end of the #Renamed Columns step, so that we don't prematurely end the query.
Since each of the hashtags refer to a step, having two steps called #Renamed Columns is causing issues. To fix this all we have to do is rename the second enstance of Renamed Columns e.g. To Renamed Columns 1, and then change the output (in) to Renamed Columns 1 as well.
The final thing we have to be aware of is that the #Promoted Headers step is referring to the GSheets data source, so we should comment that out and make sure that the #Changed Type step refers to #Renamed Columns instead.
After this we can hit done and the query should be updated to refer to the new source type. See the outcome below!