
Disclaimer: This post focuses on Alteryx macros. You can actually make custom tools that are not a macro, but that is way beyond the scope of this post. You can find more on custom tools built with SDKs here.
Why?
One of the main reasons (the only reason?) for custom tools is creating ready solutions for problems you find yourself having to solve a lot. If you know others run into the same issues, you can share it with them (or better yet, upload it to Alteryx Gallery so that everyone can benefit)!
Of course the custom solution here is a macro. But you can take it to the next level so that Alteryx recognises it and places in the right category!
A great use case for such custom tools is Quality Control - making sure that the data processing is going exactly as planned. Let's look at a macro I have recently built Test 1-1 Join.
Background on Test 1-1 Join
Test 1-1 Join was created originally when I was working for a client and had to do many joins. It was expected that not all records will join, but those that did join had to be a 1:1 join, meaning no duplicates. With a big, complex workflow, I wanted a simple tool that would check if the join was 1:1 and let me know if anything was wrong.
Below is what I built:

The macro needs to be connected to the data going into and out of the join tool to be tested and based on the count of records throws an error if the join was not one-to-one for both inputs.
After the client engagement, I thought this actually might be useful and so I recreated the macro and uploaded it to Alteryx Gallery. Let's talk now about how to get a macro to show up as one of the tools in the tool palette.
How?
It's a fairly simple process (once you have your macro ready of course).
- Save it in the right place
- Assign it a Category
- Add Tags
- Add description details
- Add author details
- Share it!
1. Save it in the right place
Alteryx can automatically pick up on new macros. To make it happen, you need to map the location where you are storing all macros. Then save the new macro in the mapped folder.
But how does one map a folder?
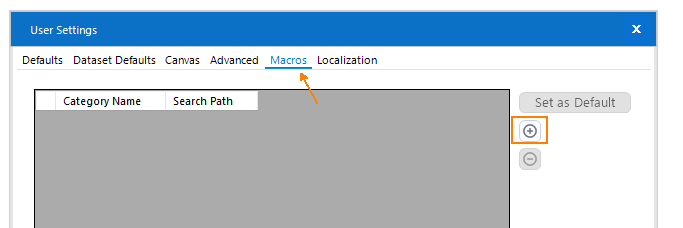
Go to Options -> User Settings -> Edit User Settings:

Navigate to Macros tab and click on the plus button:
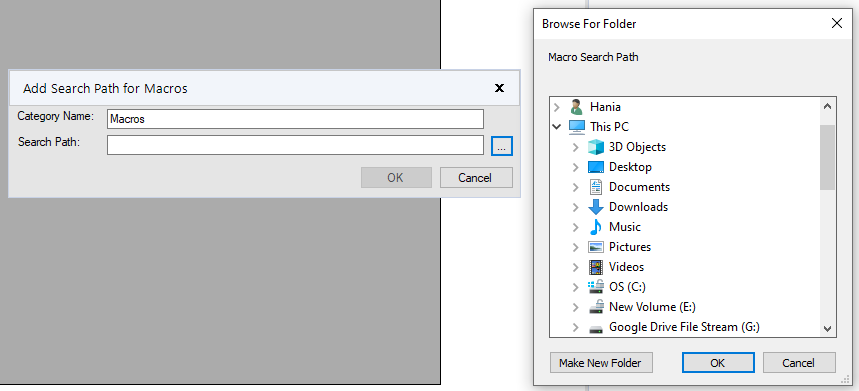
Give an appropriate Category Name. Macros works perfectly fine. Then click on the button with three dots to navigate to the folder with macros.
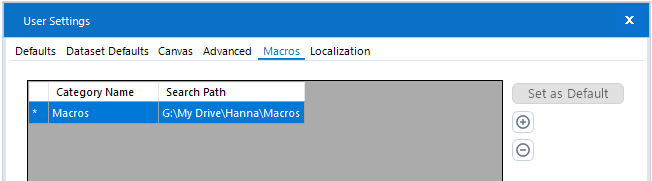
Click OK to confirm and you should see something similar:
Now whenever you build a macro, the first place Alteryx will want to save it to is that folder. (My guess is that if you have more locations saved here, you can pick one as the default for saving with the button on the right.)
If there are any macros added to that location, Alteryx will pick up on that and will show them in the ribbon with tools:

If you have any nested folders inside that folder, they will be shown separately:

In the above image, you can see that the names of the categories are based on the location relative to Macros folder. Apart from CReW Macros category... Which looks nicely formatted and not referencing the nested path. Which brings me to step 2:
2. Assign it a Category
Assigning a category in the Meta Info of the workflow configuration, will add the macro into the specified category, or create a new category!
To do so, click on the canvas, so that the configuration pane says Workflow - Configuration, and navigate to Meta Info:

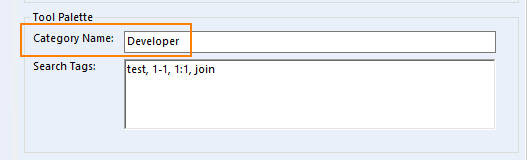
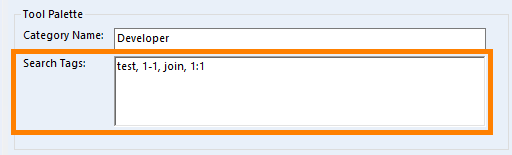
Scroll down to the very bottom of the configuration pane. The penultimate section should be called Tool Palette. For Category Name put down any of the existing categories (I chose Developer as it seemed relevant for my Test 1-1 Join) or add a new one, just like CReW Macros in their Moving Summarize macro.
After saving any changes made, and maybe restarting Alteryx (particularly if you create a new category), the macro should be presented as one of the tools in the right category!

This will get your new macro to be presented as one of the tools. But why stop here? We can make our lives even easier!
3. Add tags
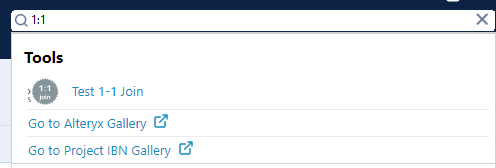
In the same section as assigning the Category Name, you can list tags related to the macro. Why, you ask? This will show your macro in the search!
In Search Tags, list key words which should be associated with your tool. In my quick test, it seemed that the parts of the name of the macro will be picked up on by the search bar/ If you want any additional words to bring up your macro, here's the place to do so. For example, if I add 1:1 phrase (I named my macro Test 1-1 Join, to make sure I don't get any issues with a colon sign in the file path):
I can use 1:1 to find my custom macro!
4. Add description details
In Meta Info tab, you can also give the description of the workflow - what is it that the macro is actually doing? This will be displayed on the Alteryx Gallery page of your macro. (Orange highlight in a picture below.)
You can also add a URL and specify the display text (blue highlight below). This is very useful for adding additional resources, eg. documentation. I have created a documentation page on Notion which makes it easy for me to maintain it. But you can use other tools that you like (eg. Google Docs)!
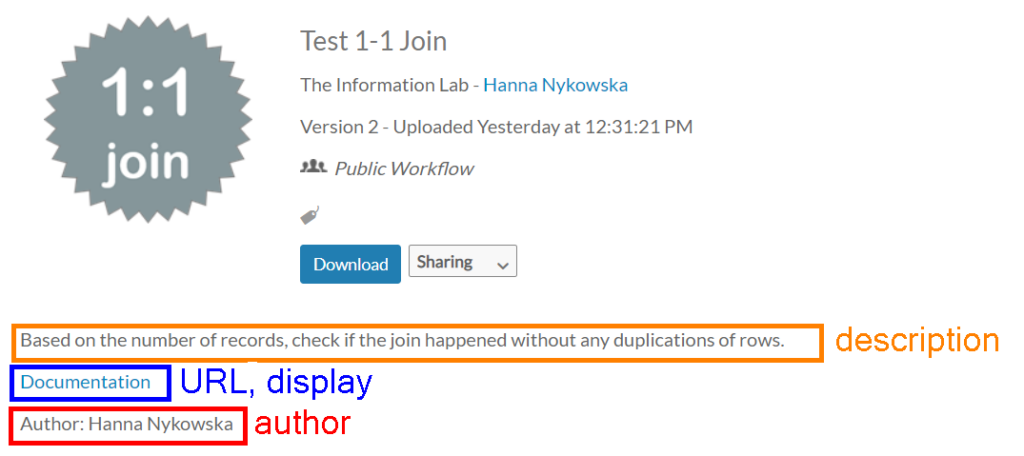
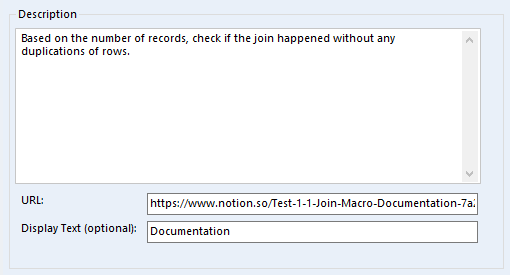
Both description and URL with display text can be set up in Description section of Meta Info:
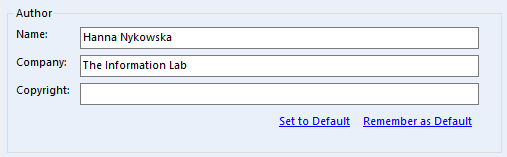
5. Add author details
Final touch in terms of providing information is to specify the author and the company, so that people will know who they should contact if they have ideas for improvement or if they look for more goodies!
6. Share it!
OK! Now that the macro is ready to be shared with other people there are pretty much two ways I'd suggest.
ONE: In the mapping section (Step 1), use a folder that's on a shared drive or location that others have access to. That way they can map the same location in their own instance. Whenever the macro is updated they will get it automatically!
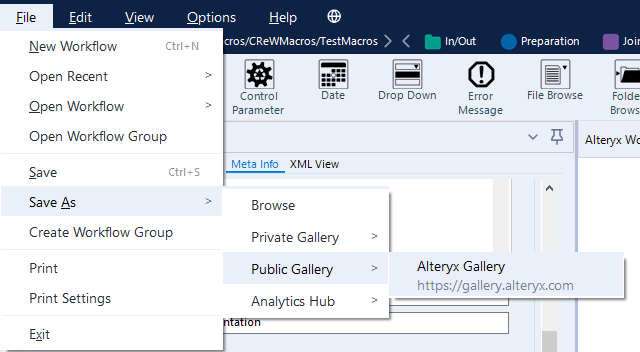
TWO: Save the macro on Ateryx Gallery and Publish. This will require an update to the saved file on Alteryx Gallery whenever you want to change anything. The massive advantage of this approach is that it will be available to many other people also outside of your organisation! You can actually find other custom tools (and macros) on Alteryx Gallery, including those developed by Alteryx!
Let's talk through option number TWO (do it only if your macro is to be shared publicly). Go to File > Save As > Public Gallery > Alteryx Gallery
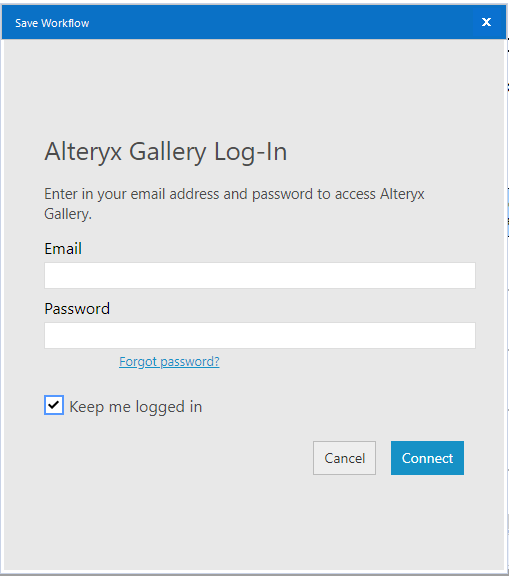
If you haven't already, log in in the new pop-up window:
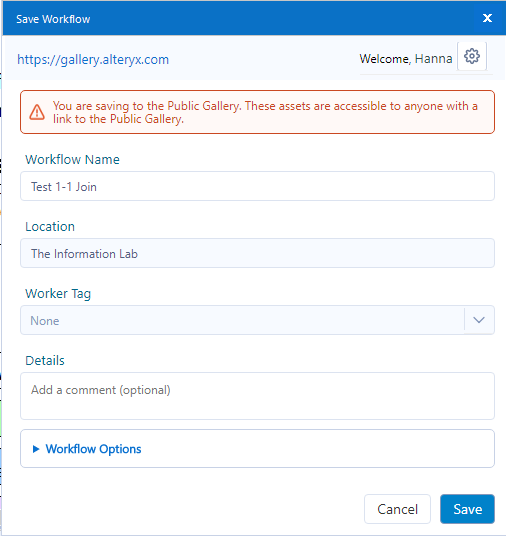
You will see now a dialog to save the workflow on Alteryx Gallery. You can change workflow name if you want (I left mine as the default). A comment in details (optional) is what shows up as a comment next to the version of the tool (which you can see only after logging in and for your own tools). If you want to have a description of the workflow, go back to Step 4.
In workflow options, you can go to manage assets and make sure any necessary external resources are included in the upload. For example, if you build a macro that connects to a data file, you probably want to include that. What you can see in my screenshot below are assets related to Count Records macro. As this is a macro that comes with Alteryx, they don't have to be included for the macro to work. (Same with data cleansing tool!)
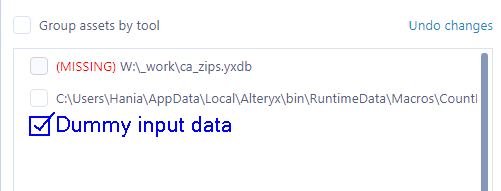
Side note on downloading workflows with Count Records macro from Alteryx Gallery - they will likely throw some errors on those missing dependencies. Clicking through OK is enough - those errors will not affect how the overall workflow works.
Once managing assets is sorted click Done, it will take you back to the general save page. When you're happy with your settings, hit Save.
After the upload is complete, you will have the option to see it in the browser. This is what I see (I saved mine as Test 1-1 Join2 so that I know which one to delete once I'm done....)
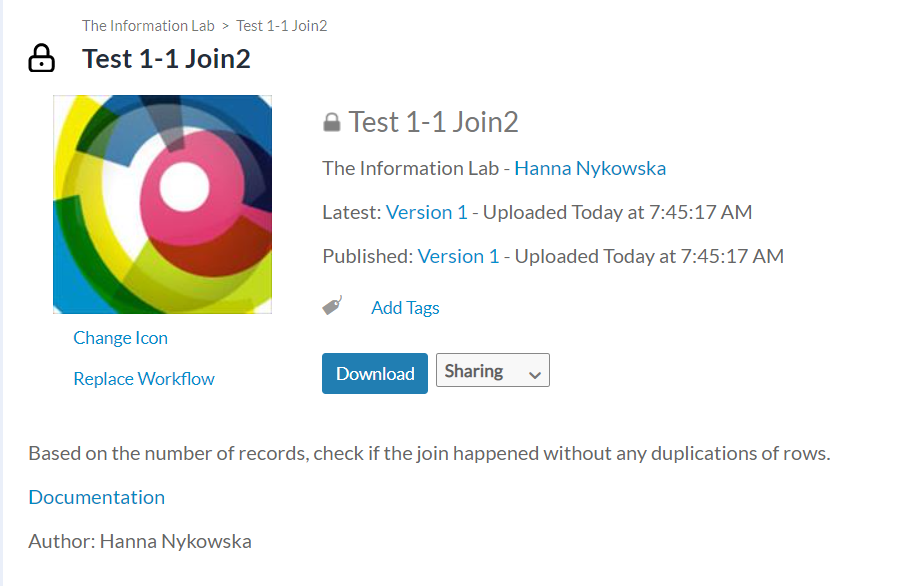
A few things to change: the image, sharing, tags. Click on Change Icon button (below the current icon) and select an appropriate image - I chose the same file I used for the macro icon.
Add Tags (just above the Download tool) will help categorise your upload. It will be a multi-choice selection.
At the moment, the workflow is accessible only to you. Go to Sharing dropdown, select Place in Public Gallery. This will allow anyone with a link to your tool page to access it (including people who are not logged in), and your macro will show up in the search on Alteryx Gallery page.
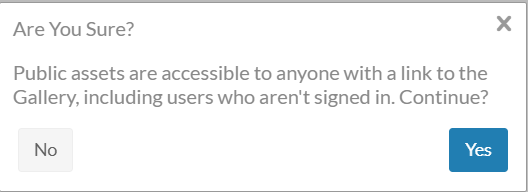
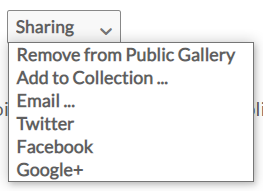
Click on Yes and let people know what you've published so that they can take the advantage of it! If you go to Sharing again, you will see that the options now have changed:
For guidance on how to install new tools from the gallery, you can use the How to Install section of my Test 1-1 Join tool documentation here.
That's it! Thanks for reading and enjoy your new custom tools!