

In this post we are going to demonstrate how we can make use of the 'Message' tool to create a 'break point' within your workflow.
When we talk about 'break points' we are referring to the idea of completely stopping our workflow from running if a specific condition is not met, simultaneously halting your downstream actions and thus preventing any write operations.
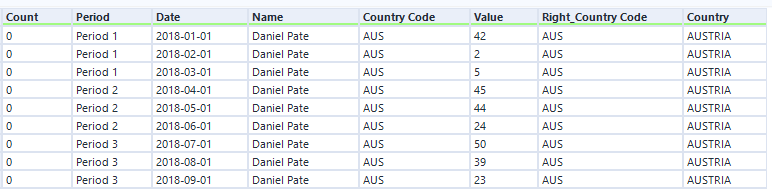
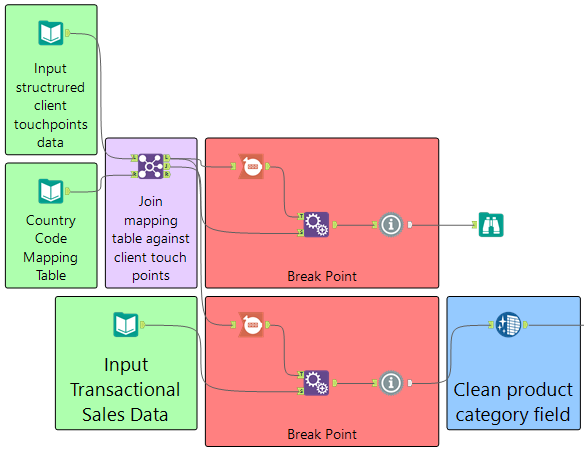
In our example we have a scenario where you only want to proceed if there are no records falling out of the join process, this is a good example as it would indicate there are missing values in your lookup table and is something you are going to likely want to inspect before your workflow writes to your output file.
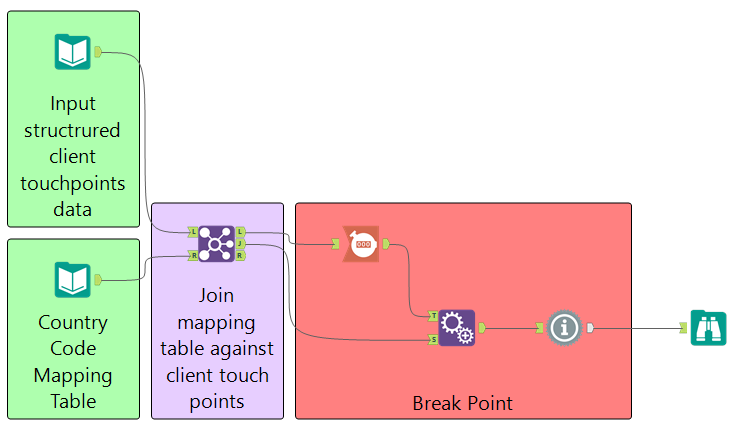
In this scenario we take the anchor which we want to check has no records and use the 'Count Records' tool to return a single cell of data containing the record count. If that value is 0 then we will be happy to proceed with our data flow, otherwise we want to halt the downstream processes which would be connected to our 'J' anchor.
Because we want to stop the 'J' anchor processing any further, we must take our count value and apply it against every row of data from this stream, which is what we are doing with the append tool. As a result you end up with something like that given in the image below.
Once we have appended our count value against the data stream we would like to halt, then we can use the 'Message' tool to actually build the 'break point'.
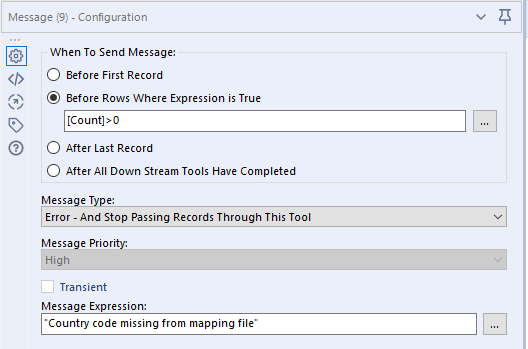
In the configuration window we can then use the 'Before Rows Where Expression is True' option, and detail the test we want to give. In this scenario I want to error in a case where the count is greater than 0.
We can then choose the 'Error and Stop Passing Records Through This Tool' option, and give a message expression that makes sense to any user whom is trying to understand why there is an error in the process.
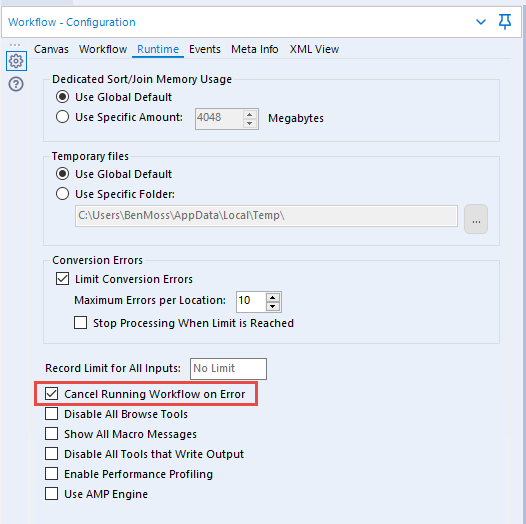
What is critical is that your workflow is configured to stop running in cases where an error is identified, this can be controlled in the 'Runtime' tab of the workflow configuration pane.
This example can be expanded further to prevent a completely separate data stream from processing, by performing the exact same steps, this time against your second data stream.
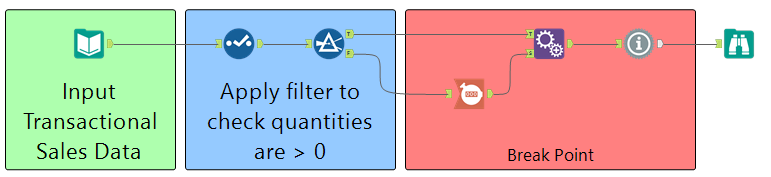
You can apply this 'design pattern' in many different scenarios, say a case where you want to stop your workflow if not all of your records are flowing through the 'True' anchor of a filter tool, this example is shown in the image below.
As usual, you can find download the workflow used in this example here.
Ben
It's worth noting, we are aware this process can be done in a number of ways and with less tools but that's the power of Alteryx, this is just one way in which you can create 'break points' in your process.