

7 August 2018
This is the second post exploring the Alteryx Python SDK extension module. Result I am after - click to enlarge[/caption]Following the recipe previously described, there are just a couple of tweaks needed, as I want a numeric spinner to set the number of columns:
 Result I am after -- Click to enlarge[/caption]Similar to v1a, I will let the user define how many rows to add (and maybe set some safety limits inside the python code) via widget in the interface (this time, a plain 'TextBox'); therefore, right there, two modifications to the existing files are needed:
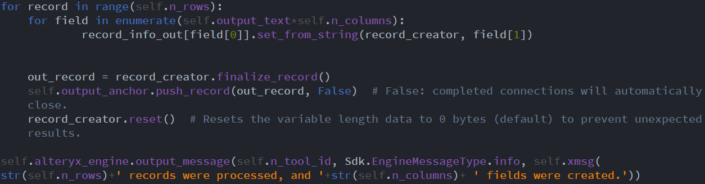 And...that's it! Second step finished. The installer can be found here (unzip it if you just want to have a look at its contents).
 Final Tool - Click to enlarge[/caption]You can download the installer from here (unzip it if you just want to have a look at its contents).All in all, still not a very useful tool, but I know now how to create one, how to modify the settings in the GUI and how to retrieve those settings in the Python Engine and push the multiple records and fields through the output anchor... Next post, I will finally get the tool I wanted from the beginning (and show how to add custom packages to the installer).
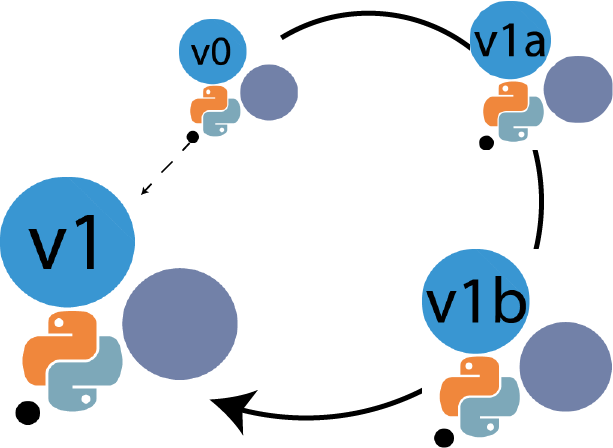
Adding bits of functionality:
Using as a template the very basic Alteryx Python SDK tool, I will now start to add some functionality with the objective of understanding how to handle:- Multiple columns (fields).
- Multiple rows (records).
- Free Text
v1a - Multiple Columns:
[caption id='attachment_11893' align='aligncenter' width='600'] Result I am after - click to enlarge[/caption]Following the recipe previously described, there are just a couple of tweaks needed, as I want a numeric spinner to set the number of columns:- Add the numeric spinner widget to the
...Gui.htmlfile. I want to add some constraints (i.e. have at least one and at most 20 columns), so these need to be defined. I find it useful to use as a template the HtmlGuiSdk tool (available in Alteryx in the 'SDK examples' section) as it has multiple widgets for user interaction. - Connect the value of the numeric spinner (after user interaction) with the python engine to be able to generate the required number of columns.
- Modify the code to push one record with the required number of records.
...Gui.html:
Two main changes:- Load a numeric spinner widget inside the fieldset section:
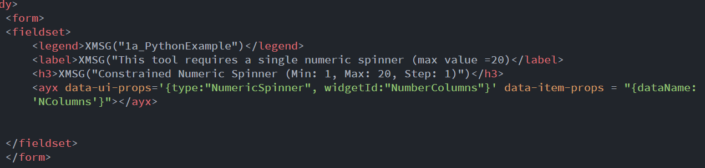
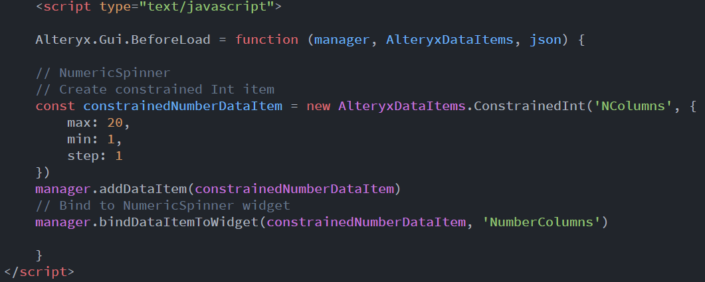
- Add the constraints as a script inside the body section:
...Engine.py:
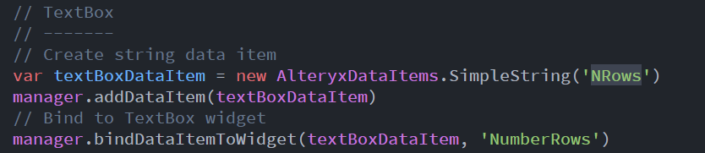
Two main changes:- Connect to the number spinner:
- I will be storing the value in self.n_columns:
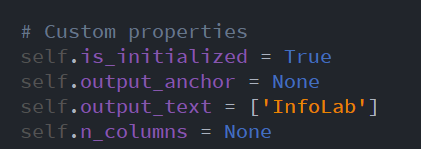
- And now, getting the value from the xml:
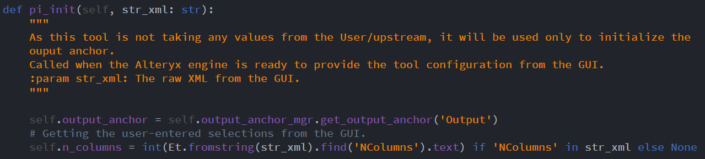
- I will be storing the value in self.n_columns:
- Modify the layout to define the type, name, etc. of the N columns :
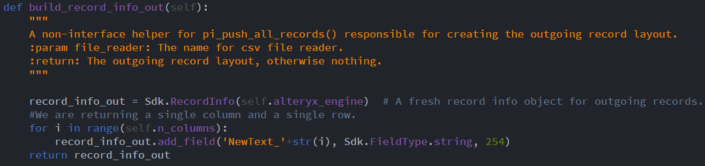
- Modify the code to generate N columns:

v1b - Multiple Rows (Records):
[caption id='attachment_11905' align='aligncenter' width='600'] Result I am after -- Click to enlarge[/caption]Similar to v1a, I will let the user define how many rows to add (and maybe set some safety limits inside the python code) via widget in the interface (this time, a plain 'TextBox'); therefore, right there, two modifications to the existing files are needed:- One to the
...Gui.html: to add the widget- Fieldset:
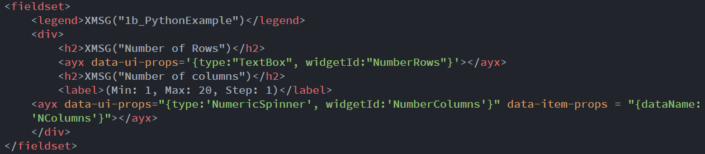
- Script:
- Fieldset:
- One to the
...Engine.py: to retrieve the value- __init__:
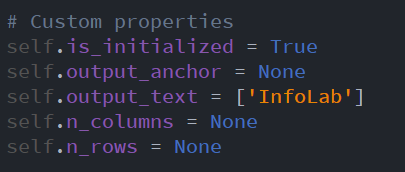
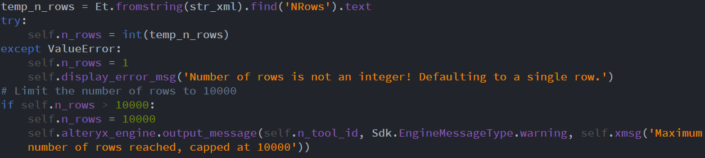
- pi_init: obtain the value and make sure it's an integer. I'm also truncating the ouptut to 10000 records and throwing a warning message if the selected number is greater than that.
- __init__:
And...that's it! Second step finished. The installer can be found here (unzip it if you just want to have a look at its contents).v1 - Custom Text:
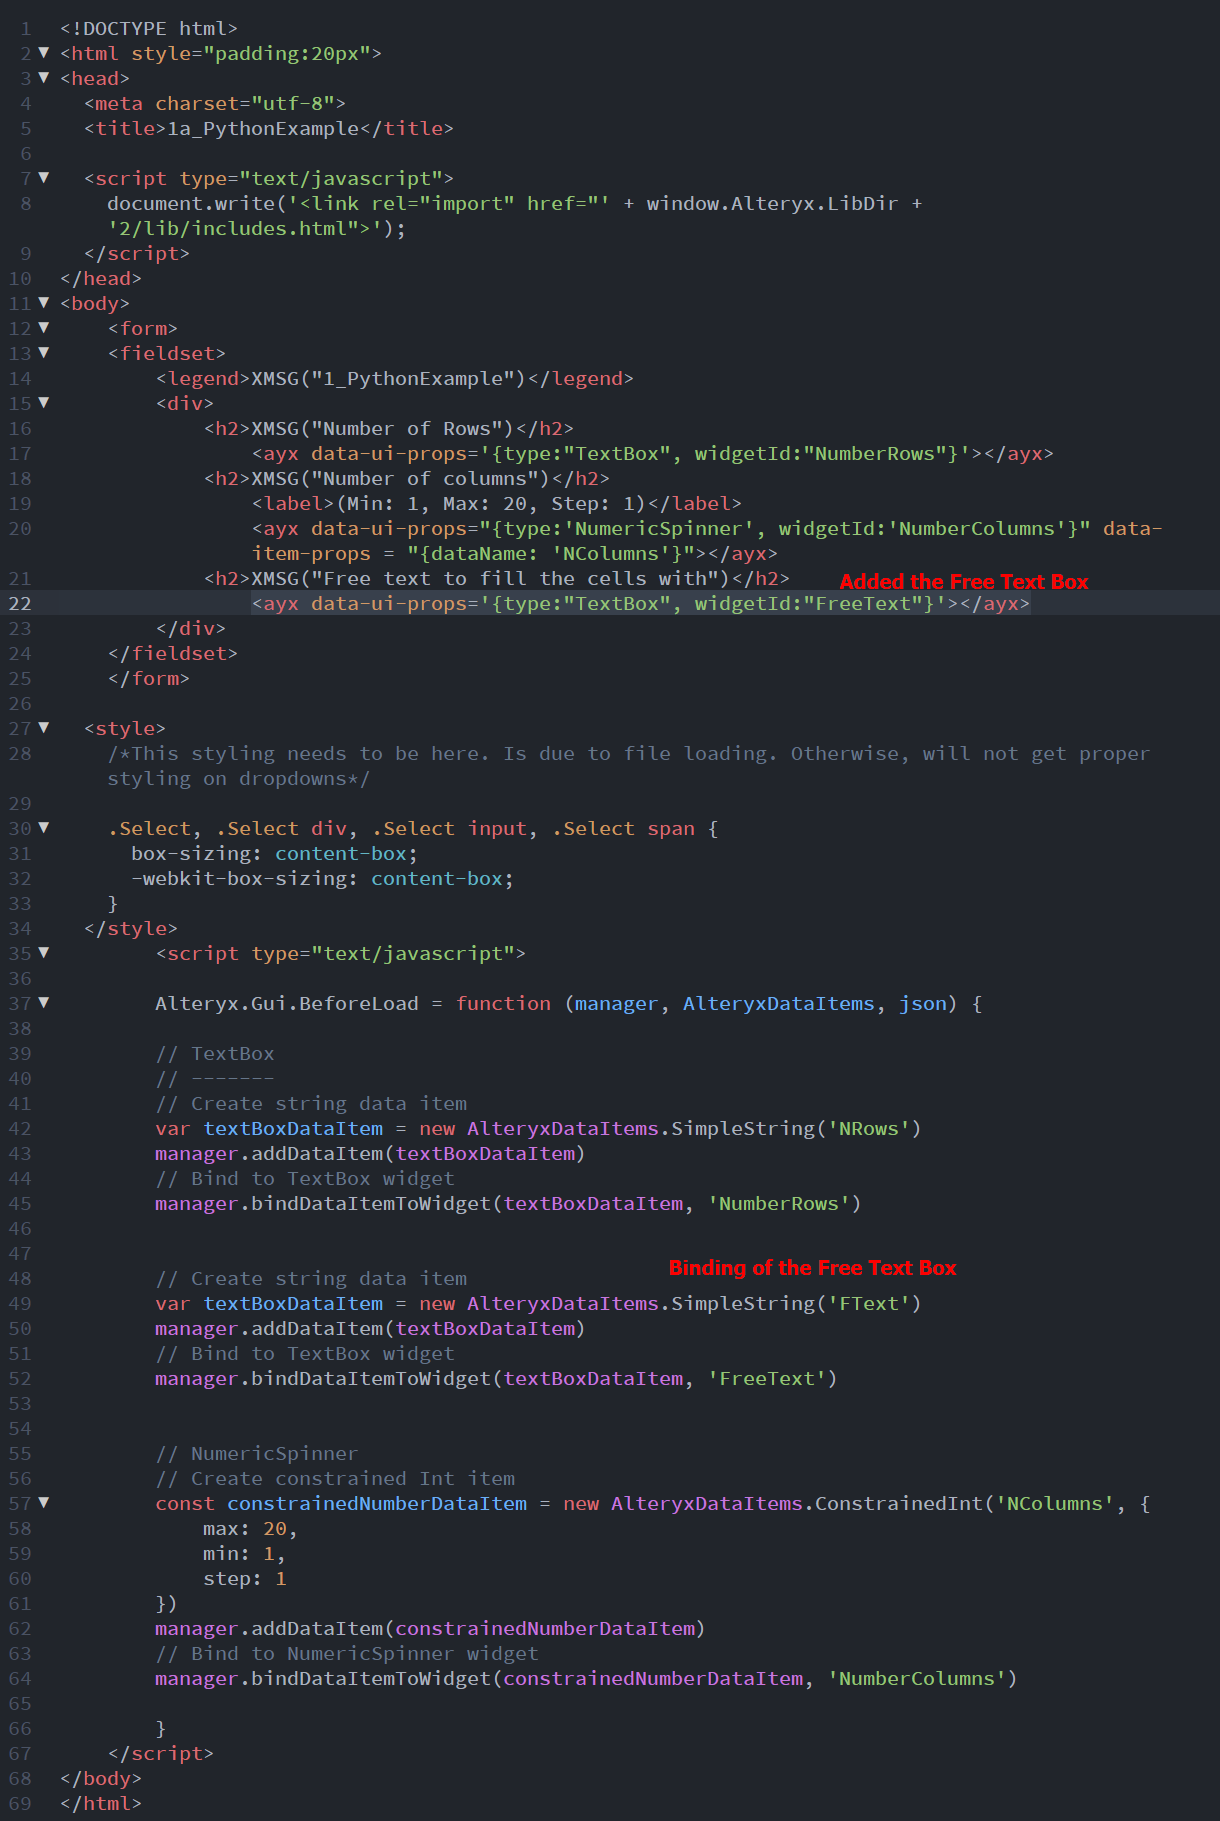
The only thing missing from the requirements is something to allow the user to define the text in each cell... I can visualize it now: a text box in the GUI, adding the string variable in the...Gui.html and retrieving it in the ...Engine.py...It's getting easier every time.- Final Gui: added a textbox named 'FreeText', variable 'FText'.
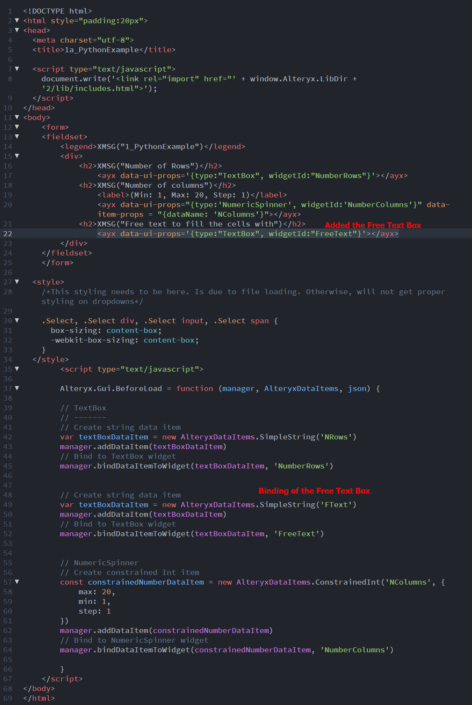
- Final Engine: Retrieve text from XML and run some checks, added a row & column indicator to the output so that I can visualize how Python and Alteryx process the records and fields.[caption id='attachment_11934' align='aligncenter' width='273']
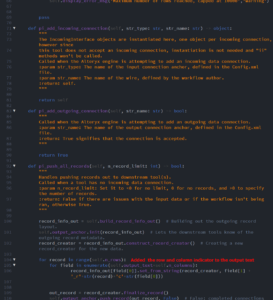 Final Engine - Click to Enlarge, then save to open.[/caption]
 Final Tool - Click to enlarge[/caption]You can download the installer from here (unzip it if you just want to have a look at its contents).All in all, still not a very useful tool, but I know now how to create one, how to modify the settings in the GUI and how to retrieve those settings in the Python Engine and push the multiple records and fields through the output anchor... Next post, I will finally get the tool I wanted from the beginning (and show how to add custom packages to the installer).